

With InnoBooks, you create an estimate, send it to your client, and they can accept and sign it directly online — no account needed. Once accepted, an estimate converts into an invoice in one click. Here’s how to do it from start to finish.
What you’ll need
- A client saved in InnoBooks (with an email address for sending).
- Your business information and taxes (GST 5%, QST 9.975%) set up.
- Permission to create estimates.
Steps
- Open the new estimate form
Open the
Estimatepage, then clickNew Estimateat the top right to open the creation window.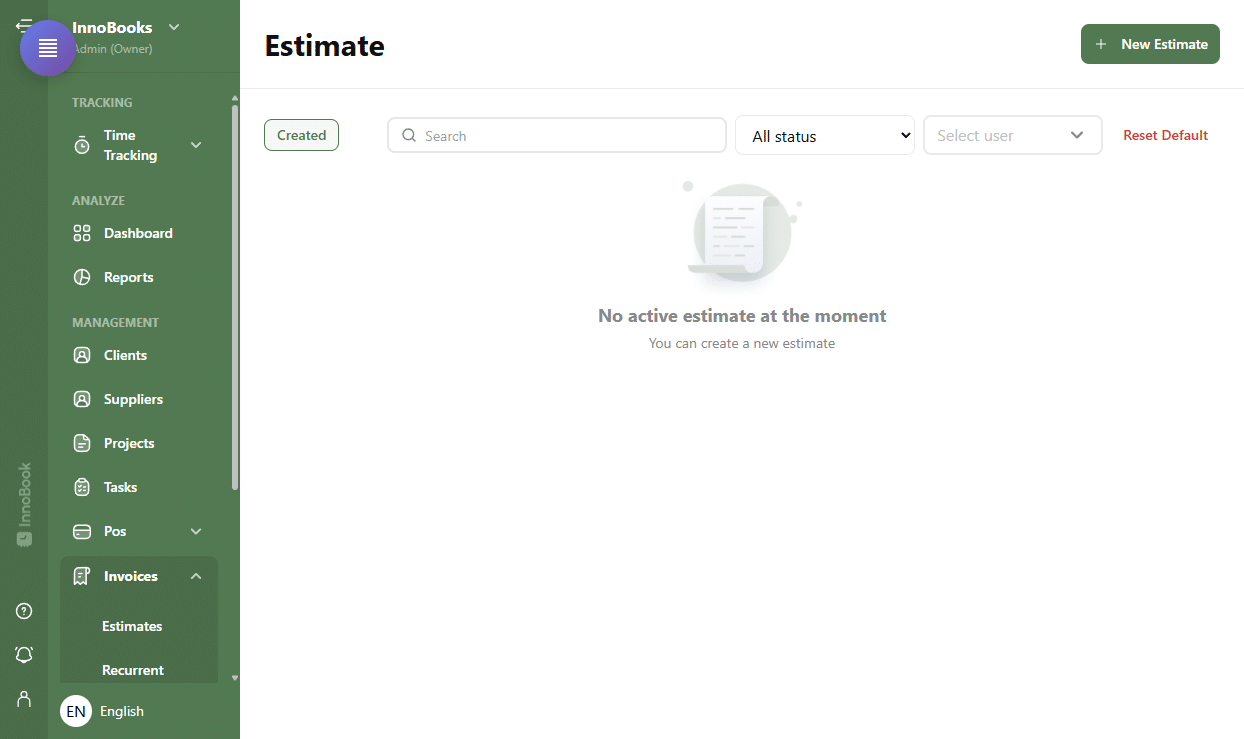
The Estimate page with the New Estimate button highlighted. - Fill in the estimate header
Select the client in
Sent to Client/Project. TheEstimate Numberis generated automatically. Choose theIssue Estimate Date, set the owner inCreated by, and add aDescriptionif needed. - Add line items and taxes
Click
+ Add New ItemorAdd new line, then fill in the description, theRateand theQuantity. In theTaxcolumn, use+ Add Taxesto apply GST and QST. TheSubtotaland total amount are calculated automatically. - Send the estimate to the client
Click
Send Estimateat the bottom of the form (orSaveto keep it as a draft). The send window shows theTo Emailfield pre-filled with the client’s email and a message preview; clickSend Emailto send it. From a saved estimate’s detail page, you can also useSend EmailorShare by linkto deliver a secure link. - The client reviews, accepts and signs online
Opening the link they received, the client sees the estimate (items, taxes, total) and the
Accept This Estimatesection. They enter theirFull NameandEmail Address, draw theirElectronic Signaturein the box, then clickAccept Estimate. AnEstimate Acceptedmessage confirms it; on your side, the signature and theEstimate Acceptednote appear on the estimate. - Convert the accepted estimate into an invoice (Optional)
On the estimate’s detail page, open the
Moremenu and chooseConvert to Invoice. Confirm: InnoBooks creates an invoice with the same items and taxes, ready to be sent and paid.

Tips & edge cases
- The client doesn’t need an InnoBooks account — the acceptance link is enough.
- To accept an estimate yourself (for a client on the phone, for example), use the
Moremenu thenAccepton the detail page. - An estimate stays editable via
Edituntil it’s accepted; you can alsoDuplicateit from theMoremenu. - As with invoices, taxes are added line by line from those configured in your settings.
Frequently asked questions
Does the client need an account to accept the estimate?
No. They open the link you send, fill in their Full Name and Email Address, sign in the Electronic Signature box, then click Accept Estimate. No sign-in is required.
What happens after an estimate is accepted?
The estimate’s status changes to accepted and the client’s signature appears on it (the Estimate Accepted section with Client Signature). You can then convert it into an invoice.
How do I turn an accepted estimate into an invoice?
Open the estimate, click More, then Convert to Invoice and confirm. A new invoice is created with the same lines and taxes.