
In InnoBooks, you log your work time project by project, either with a live timer or by typing the duration in by hand. The timer stays visible everywhere in the app while you work, and each entry can be marked billable so you can re-invoice it later. Here’s the full walkthrough.
What you’ll need #
- A project or client already saved in InnoBooks to log your time against.
- Optionally, a service attached to the project if you want to specify the type of work.
- Permission to log time (time tracking).
Steps #
- Open the Time Tracking page
From the menu, open the
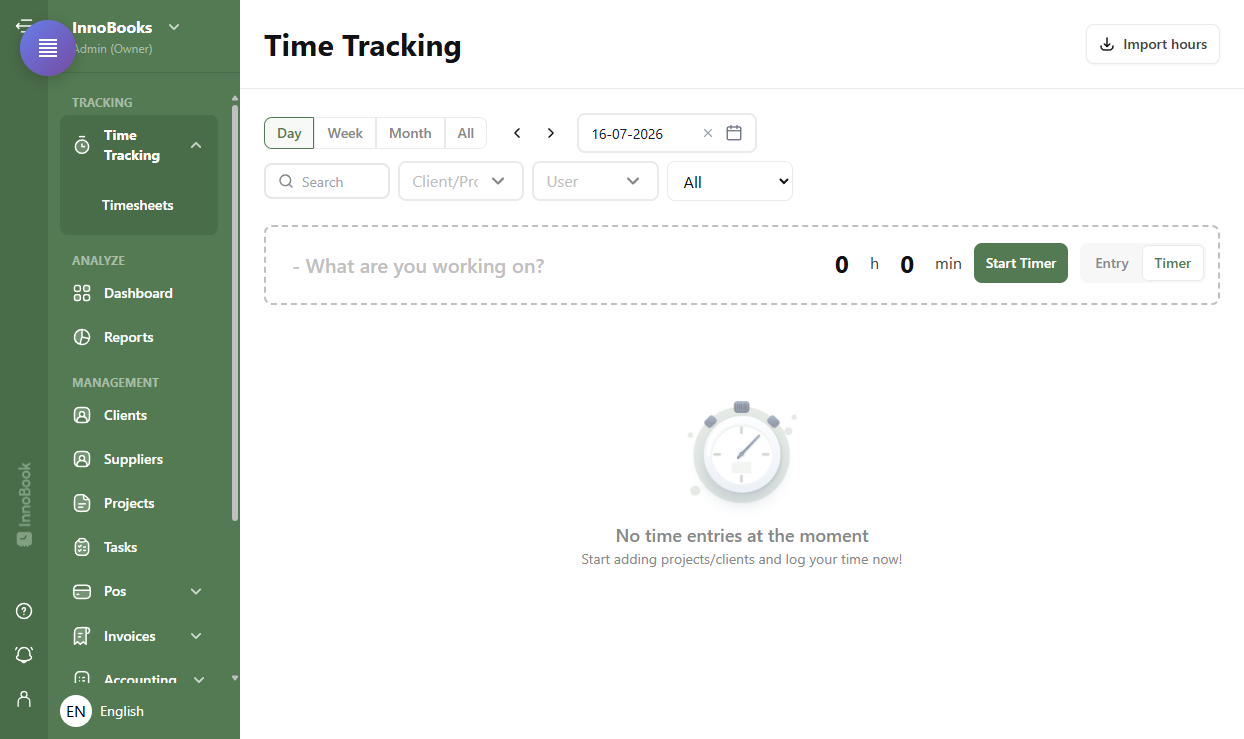
Time Trackingpage. At the top of the list, choose theDay,Week,MonthorAllview. The dashed entry band appears just above your entries.
The Time Tracking page with the Day / Week / Month / All tabs and the dashed entry band. - Choose the project, client and service
In the entry band, click
What are you working on?to search for and select a client or project. Once the project is chosen, clickChoose Serviceto specify the service if needed. - Add a note and check the options
Add a note in the
Notefield if you wish, pick thedate, and tickBillableif the time should be re-invoiced to the client. Managers can also log time for another employee using theFor myselfselector. - Choose Timer or Entry mode
On the right of the entry band, switch between the
Timertab (live stopwatch) and theEntrytab (typing the duration manually). - Start and log your time
In
Timermode, clickStart Timer: the counter runs live and you can pause or resume it with the pause/play button. When you’re done, clickLog time(orDiscardto cancel). InEntrymode, type the duration in the hours field, then clickAdd Entry. - Import several hours at once (Optional)
To add several entries at once, click
Import Hoursat the top right, download theCSV template, fill it in (date, start time, end time), then upload the file. InnoBooks recognizes the project, client, service and employee by name and shows you the valid rows before importing.
Tips & edge cases #
- The timer stays in a floating panel everywhere in the app: you can navigate elsewhere and it keeps counting. If no project is selected, it shows
No client. - Filter the list by
Client/Project, byUser, or by billing status (Billable,Billed,Unbilled…) to find your entries quickly. - Discarding a timer asks for confirmation (
Are you sure you want to discard this timer?): nothing is saved until you clickLog time. - Billable time logged on a project can then be pulled into an invoice or a timesheet.
Frequently asked questions #
Does the timer keep running if I change pages? #
Yes. Once started, it appears in a floating panel across the whole app and keeps counting while you work elsewhere. You pause it with the pause button, then save it with Log time.
Can I enter my hours without using the timer? #
Yes. Switch to the Entry tab, choose the project in What are you working on?, type the duration in the hours field and click Add Entry.
How do I import several entries at once? #
Click Import Hours, download the CSV template, fill in one row per entry (date, start time, end time), then upload the file. The project, client, service and employee are recognized by name.


